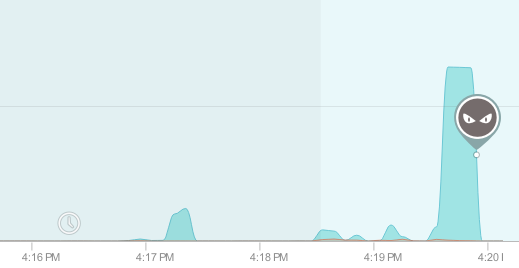
With GlassWire 1.2.79 our team spent a lot of time rewriting how our “network” feature works for our paying users, and the results have been great!
Unfortunately with previous versions of GlassWire some of our users would report that some of their devices would show up as “unknown” or not show up at all. Now with GlassWire 1.2.79 new devices show up almost immediately when joining the network.
One cool GlassWire feature that people wanted was the ability to know when a new device joined their network that has never joined before. With GlassWire 1.2.79 these new devices show up almost instantly. It’s great to know when a new device joins your network because if it’s not one you know of, it could be a malicious device you don’t want on your network. You can then figure out what type of device it is because GlassWire will show you the manufacturer name in most cases.
If you don’t have a paid version of GlassWire you can upgrade here to use our “network” tab with this new improved functionality. Paid users can click the “upgrade” download link below to update their software version and use this new functionality immediately.
Recently both WOT and Nvidia were in the news for the way their software was collecting and sending back data from their users.
WOT was in the news due to a report from a German TV channel. The report claimed that WOT collects and sells data about your browsing habits, and then that collected data can be tracked back to specific users.
After reviewing the data, Mozilla (the creators of Firefox) removed the WOT plug-in from their add-ons directory. We at GlassWire were saddened by this news because we found WOT to be a useful resource for looking up websites to see if they were safe or not.
Nvidia was also in the news for collecting telemetry data, similar to what Microsoft started doing with Windows 10. Please note though with Windows 10 in many cases it’s possible to stop telemetry data collection. MajorGeeks has a detailed report and video on how to disable Telemetry with the Nvidia software, or you can go to the GlassWire Firewall tab and block the software from accessing the network at all.
Fortunately, if you’re a GlassWire user you can stop most badly behaving applications from sending any data about you out at all. Paying GlassWire users can switch to GlassWire’s “Ask to connect” mode and block all new unknown connections from sending out any data about you. Free GlassWire users will be notified when a “new” application accesses the network, then they can go to the Firewall tab and block the application.
You may also be wondering if GlassWire collects or sells user data. Please note with GlassWire that none of your network usage data ever leaves your PC and we could never see it or collect it even if we wanted to.
Our privacy policy confirms this, and we even allow GlassWire to block itself with its own Firewall tab if you’re concerned. However, we don’t recommend that you make GlassWire block itself or you won’t know about software updates, and your malicious host list will never be updated.
We built GlassWire as a tool for ourselves to stop malicious apps and malware from spying. GlassWire makes money through sales of our Basic, Pro, and Elite software so we have no need to collect data about our users and sell it. Also, our entire team despises spying apps and we made GlassWire specifically to fight against that type of behavior!
Next time you download a free app check out its privacy policy first. If you are not paying for the app then you yourself may be the product. You should consider that if you are not paying for the software then it may be your browsing habits or other data about you that’s being sold to others.
Fortunately, you can always use GlassWire as a tool to see what apps are sending out data from your PC, and block them.
Update: Howtogeek.com has an article on the Nvidia situation that says the Nvidia software is not spying and the situation was a misunderstanding.
You may have heard recently how the popular security blog Krebs on Security was taken offline by a record DDOS attack along with Friday’s major attack on DynDNS.
The reason these attacks are newsworthy is because the attacks are so massive that even the best anti-DDOS systems like Akamai’s could not keep Krebs or DynDNS online. Cloudflare recently posted some visualizations to show how large these types of attacks can be.
The reason these attacks were so powerful was because they were created from a botnet of “Internet of Things” devices that are unsecured by default, also known as the “Internet of Sh*t”. Hackers created this new botnet called Mirai that searches the Internet for unsecured DVRs and IP cameras with default passwords.
Unfortunately, now the Mirai source code is available to anyone, so these attacks will probably become more frequent and grow even larger. Currently live Mirai infections world-wide are mapped by a security site called Malwaretech.com and the infection has spread to almost every country world-wide.
One of our favorite Twitter accounts that we follow is called InternetOfShit. The account makes fun of how ridiculous it is to connect all these new devices to the Internet, and how they are mostly unusable and unsafe.
Do you think you may have an Internet of Sh*t device on your network? Go to GlassWire’s “Network” tab to see a list of all the devices on your network and get alerted when a new unknown device joins your network.
If you do have a Sh*t device on your network please do us all a favor and unplug it, or at least change the default password. Not only could your Sh*t device be sending out DDOS attacks, it’s probably slowing your Internet access down considerably.
By the way… if you haven’t already, don’t forget to follow the InternetOfShit!
This update uses a new default listening port (7010) for remote access to other GlassWire clients. If you have remote GlassWire clients you are monitoring you’ll need to update your local client along with the remote client or the connection will fail. The ports were changed due to user feedback. Apparently some network security software will give false positives if certain ports are used. This will be a one time change and we apologize for the inconvenience.
Please note that you can still use any port you prefer with GlassWire by going to GlassWire’s settings, then the “Server” tab, then changing the port numbers there.
We also removed an old cipher that could be used locally between the client and the service, fixed a problem where some free users had a crash when trying to make a remote connection, made GlassWire’s history deletion more secure, and made some changes so local traffic is detected more accurately.
Did you know that any website you visit could be making a log of all the other websites you’re currently logged into?
Some websites do this without your permission to build a profile about you to show you targeted ads. Unfortunately, this data could also be used against you to attempt to hack you by sending you targeted exploits, clickjacking links, or phishing sites.
Do you think this problem doesn’t apply to you? You’re probably wrong.
How was Robin able to create this page? As Robin explains on the page, websites can track what other sites you are logged on to by tracking whether certain favicons or images load or not.
Another technique that can help is called “browser isolation”. One simple way to do this is to dedicate one browser for your major social media or login accounts, then use a separate more secured browser for web surfing. You can also use a “Private Window” or “Incognito mode” window in your browser separate from your logged in browser to surf the web.
The truly paranoid GlassWIre user could set up a virtual machine with a VPN, then only surf the web from that virtual machine.
Once you feel you’re protected visit Robin’s page again to confirm your logged on sites are safe again!
Do you use a VPN? Well… your IP may be leaking.
Most people don’t realize there are three main ways your VPN can leak your IP address to the public. Fortunately, there are also three fixes you can implement to solve this problem.
First let’s see if your VPN is leaking your IP to the public. Connect your VPN and visit IPLeak.net to see what your IP address is verses what IPLeak.net shows.
If everything looks good and your real IP is not visible then you can probably stop reading now, however if your real IP is visible there are some things you can do to fix it.
Tip: Not sure what your real IP is? Turn off your VPN and go to whatismyip.com. You can then turn on your VPN and see what whatismyip.com shows for your VPN IP.
Problem 1: WebRTC Leakage
The most common problem VPN users face is the WebRTC IP leakage problem. To fix the problem with Firefox you can type in about:config in the address bar, then go to media.peerconnection.enabled and set it to false. For Chrome there is an extension called Scriptsafe you can install and the reviews look positive, but please use it at your own risk. It’s probably best to use Firefox while using your VPN.
Problem 2: DNS Leakage
The second common problem with VPN IP leakage is DNS leakage. First, before doing anything check your VPN software that came from your provider and see if it has any settings that will plug the DNS leak. If you have no luck then it’s probably a good idea to use different DNS servers that are not associated with your geographic location or ISP. OpenDNS and GoogleDNS are two free options that are out there.
Problem 3: IPv6 Leaks
Now go check out IPLeak.net and see if you’re still leaking. If you’re still leaking your real IP the next step is to disable IPv6. For Windows you’ll need to go to the “Network and Internet” control panel then choose “Network Connections” and right click each entry to change the settings for each network adapter. Where it says “Internet Protocol Version 6” you’ll want to uncheck the box.
Now turn on your VPN and visit IPleak.net one more time and you should see your real IP is no longer visible. That is a lot of work to do something that you thought your VPN was already doing, isn’t it? Congratulations on being one of the few people who uses a VPN with no IP leakage!
Don’t use a VPN? A VPN is a virtual private network and many people use one to use the Internet safely on public WiFi hotspots, or to hide their IP address when using the web for privacy reasons. Check out this Blog post we wrote recently that explains the benefits of a VPN and how to get one.
By now, almost everyone has typed in their home address on Google Maps to see the viewable Google Street View image. Google Street View provides panoramic views of most major streets and cities all over the world. The images are stitched together mostly by Google cars that have a large camera on top. Perhaps you’ve even seen a Google Street View car driving around before.
Google Street View cars have taken all kinds of interesting photos over the years, and maybe you’re happy that there’s an easily accessible picture of your house online anyone can look at. However, if you don’t want a picture of your house online for anyone to see, it’s easy to remove your house from Google Street View.
How can I remove my house from Google Street View?
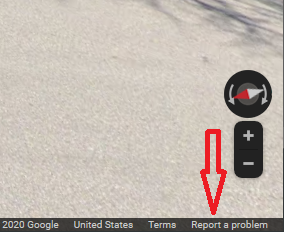
To remove your house from Google Street View go to www.google.com/maps then type in your home address. Next, click on the small picture of your house that says “Street View”. If there is no photo then perhaps your house isn’t in Google Street View at all. Now, adjust the arrows on Google Street View until you see your house.
You can then click the “Report a Problem” link at the bottom right of the image as it’s shown in the photo below.
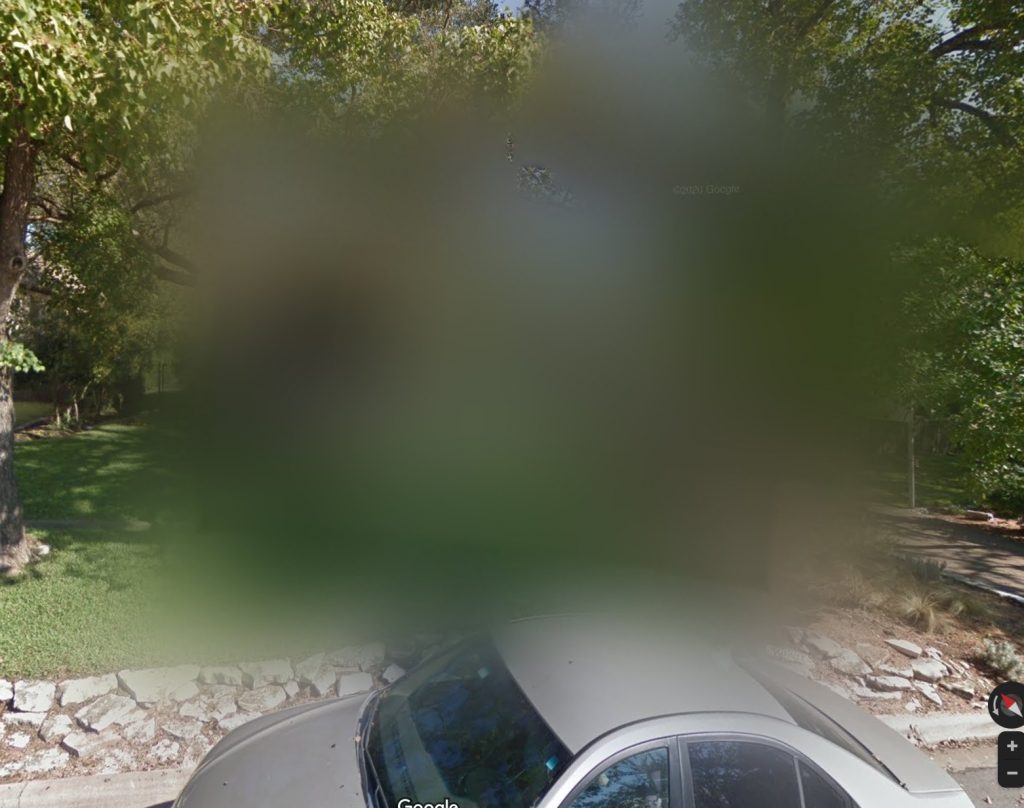
The next page you are sent to will give you the option to ask that your house is blurred. It will show some photos of your house, then you can choose the ones you wish to blur out. In some cases there could even be an actual photo of you if you happened to be outside when Google’s street view vehicle drove by. If that’s the case then you can select that picture and ask that it be blurred.
Our team at GlassWire tested our own home addresses and found the photos of our homes were blurred within several weeks of our reports. However, once you remove your house it appears you can’t ever have it re-added, so please be 100% sure you want to remove your house before filing a report with Google.
Many real estate websites and services like Realtor.com, Redfin, or Zillow make use of Google’s Street View images. If you think blurring your home on Street View could make it more difficult to sell your home the future then you may not want to remove it from Google Street View.
We are proud to announce that GlassWire has officially left its beta status behind with version 1.2.73. This GlassWire update fixed a bug with IP sorting on the network tab, fixed a problem where some users saw incorrect local/external traffic stats, along with other fixes listed here.
Thank you for your feedback and support that helped us reach this major milestone.
Are your USB ports protected or disabled?
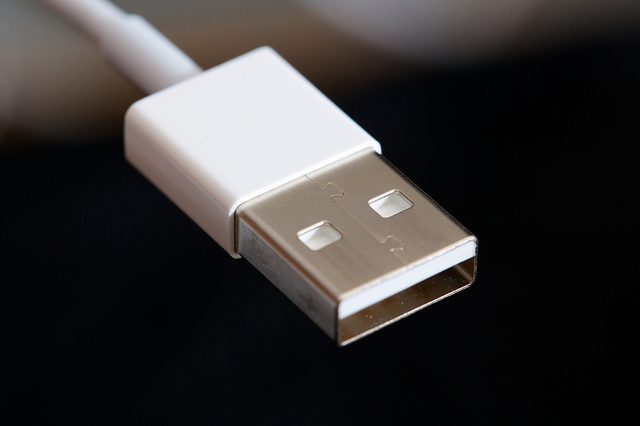
If you’re a GlassWire user then you probably spend quite a bit of time securing your PC and network. However, what good is it to secure your PC if anyone can walk up and access your USB port when you aren’t looking? Unfortunately external flash and hard drives can be used to deliver malware and keyloggers to your PC.
Some people say that if someone has physical access to your PC it’s already a lost cause, and perhaps that’s true in some cases but there are some things you can do to help protect your PC from unauthorized USB access.
One of the cool things about this USB security tip is that no third party software needs to be installed to activate it. To get started you’ll want to launch Regedit and go to the key at HKEY_LOCAL_MACHINE\SYSTEM\CurrentContro>Set\Services\USBSTOR. If you want to disable USB storage change Start’s data to 4 and to enable it again change the data to 3. You can change the “Start” number by double clicking on its row.
Please note this change should not affect any storage that is already plugged in to your PC, but it should block any new storage that connects. Feel free to give other tips on how to protect your hardware from tampering in the comments.
GlassWire 1.2.70 was released this morning. This GlassWire update makes it easy to add labels for your devices. Go to the “network” tab, then mouse over the row of the device you want to label. Click the grey bubble then type in the name you want the device to have.
How does GlassWire test to make sure its network statistics are accurate?
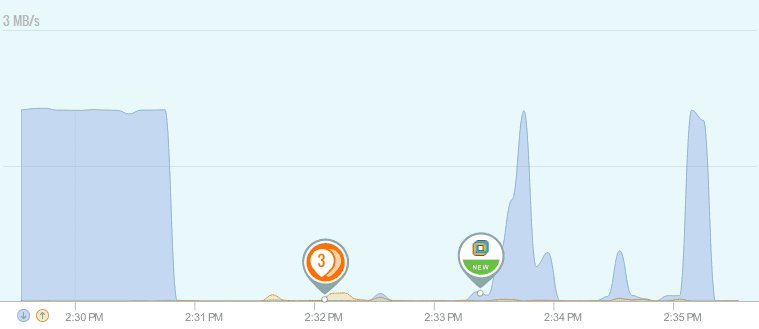
We use many different methods to test GlassWire’s network monitoring accuracy. For this blog post we used an application that downloads a specific file without any additional traffic. We used wget http://gnuwin32.sourceforge.net/packages/wget.htm
As you can see above, downloading the file showed the correct statistics inside GlassWire.
If you run into any problems with GlassWire not detecting network activity please try rebooting. In some unusual cases a small subset of users may miss network activity without a reboot.
Also please note that using browsers like Google Chrome do not give accurate test results because browsers are almost always sending/receiving data for many different reasons and this causes inaccurate results. This is why we used wget in our testing.
Please visit our forum to discuss our network statistic accuracy along with anything else so we can continue to improve GlassWire in the future.
Download GlassWire
Instantly see your current & past network activity. Detect malware, & block badly behaving apps.