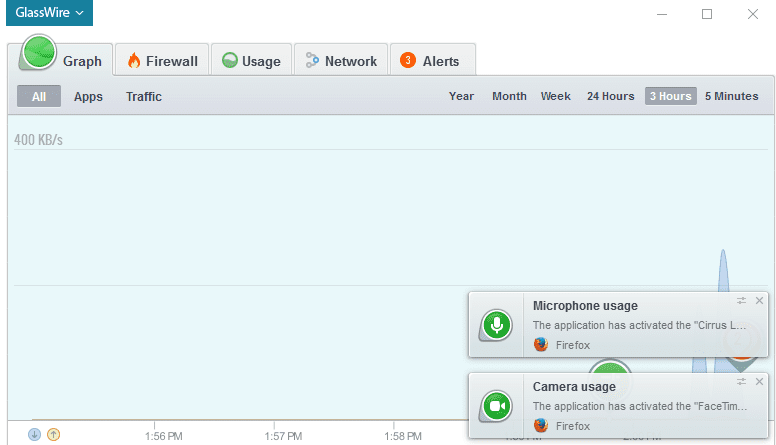
These days not only can software installed on your PC easily access your webcam or mic, but now most browsers can too! Chrome, Firefox, and other modern browsers now have built in access to your webcam and mic with WebRTC.
If you don’t want WebRTC to work in your browsers at all you can turn it off completely but some people need to use their webcam or mic with Firefox for online meetings or other online activities. It’s no fun to completely disable your webcam or mic.
We at GlassWire also felt nervous not knowing when our PCs were using our webcam or microphones, so we built in an extra security feature with GlassWire Basic, Pro, and Elite. After upgrading your version of GlassWire to one of our paid versions go to your settings, then click “security” and turn on the “Camera and mic monitor”. Once the camera and mic monitor is activated you should be alerted when any network-related application accesses your microphone.
If an unknown network-related application is accessing your webcam or mic go to the GlassWire “Alerts” tab and click its icon to learn more about the program and its location on your PC. You can also scan the app by clicking the “virus scan” button. If you’re still not sure about the unknown app try uploading it to VirusTotal.com and see if it shows more information.
Check out the screenshot at the top of this email to see how our webcam and microphone notifications work. After you upgrade to GlassWire’s paid version be sure and go to your settings then click the “security” section to enable this feature.
Update 12/3/2015: We just learned the latest Windows 10 update issued last week disabled this functionality for some users. Be sure and download our latest version of GlassWire if Mic/Webcam detection is not working for you. If the detection still is not working after upgrading to the latest version go to the GlassWire settings and make sure the Mic/Webcam detection is turned on.
Updated: This feature had to be removed due to changes to Windows unfortunately. There is no reliable way to detect Mic/Webcam usage anymore due to changes outside our control.


